
I have a Raspberry Pi with a 16×2 RGB LCD and plastic case. I felt like getting it to measure and display an accurate temperature on the LCD. Later I will add a webserver to graph the data.
UPDATE: The new version of Raspbian ships with a 3.18 kernel, that uses device trees. See this new post for updated commands to remap the GPIO.
Hardware configuration
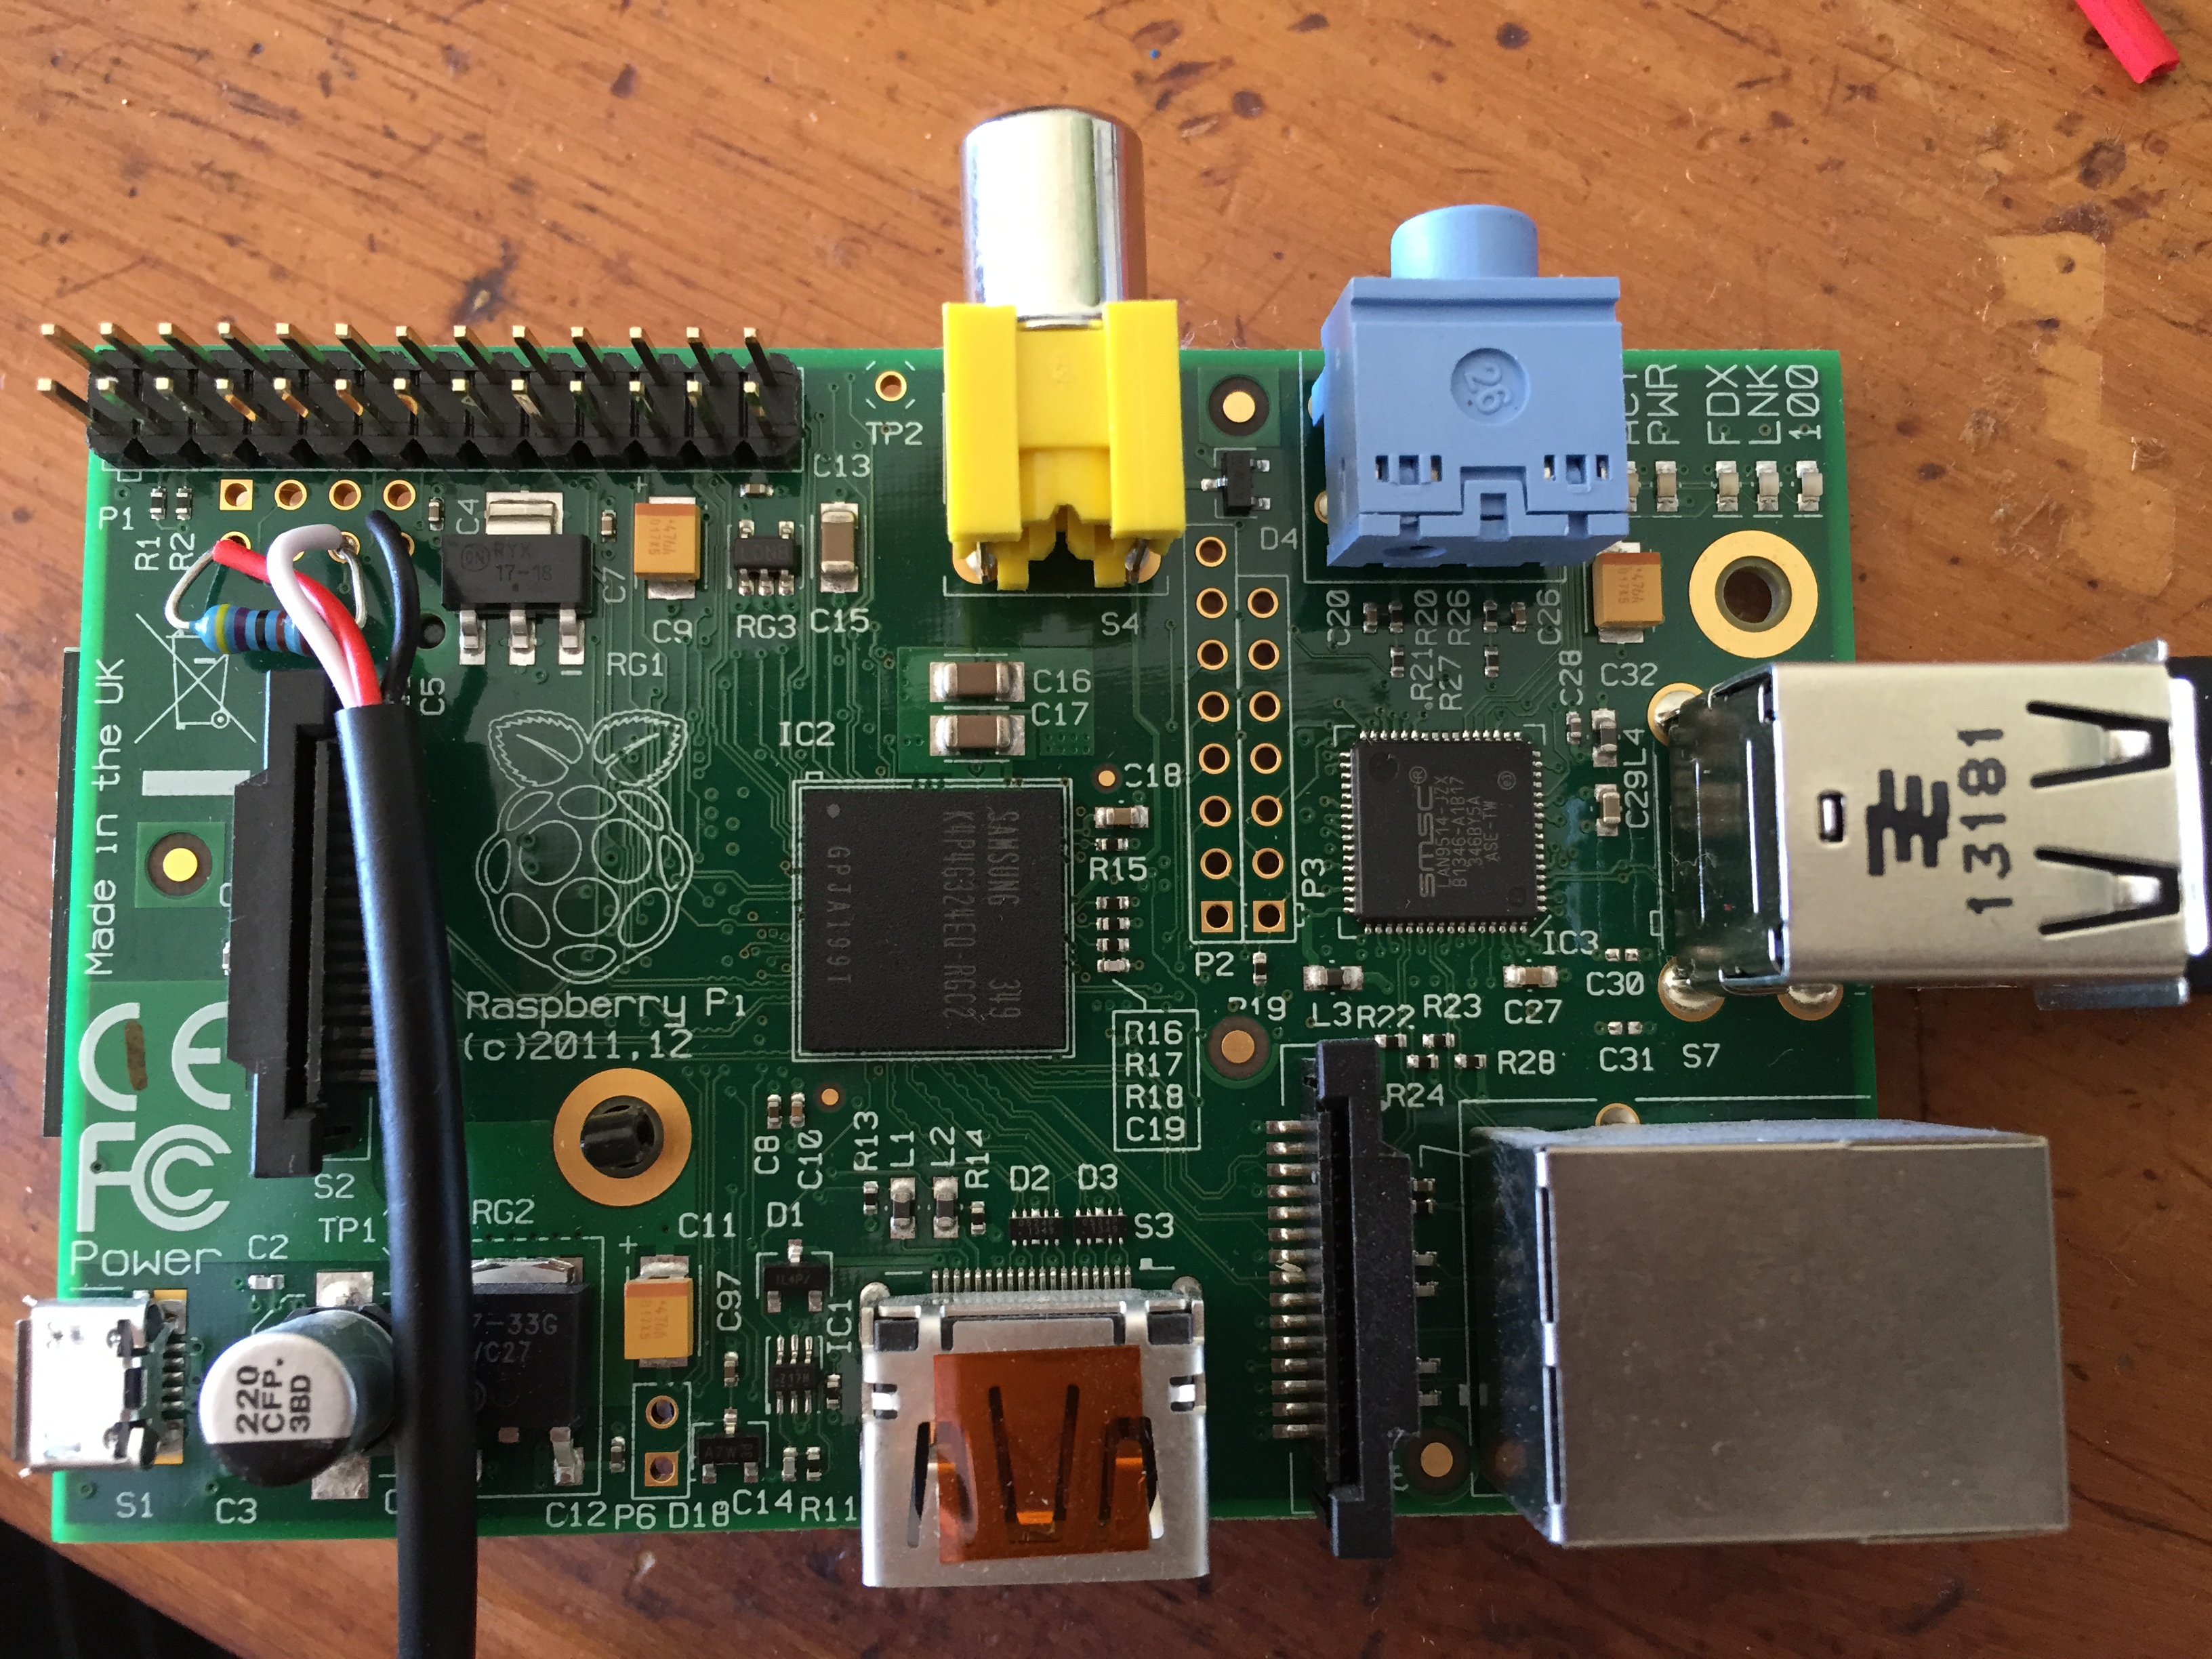
My LCD already plugs onto the GPIO header and takes up the whole header (for mechanical support) even though it only uses a couple of pins for I2C communication. Fortunately, the Model B has a second GPIO header next to the main one called P5, and we can easily solder some wires to this header
http://elinux.org/Rpi_Low-level_peripherals#P5_header
My waterproof DS18B20 has red (Vdd), white (data) and black (ground) wires although the colours often change. The pinout for P5 header will therefore be:
Pin 2 – 3.3V (red wire)
Pin 6 – GPIO31 (white wire)
Pin 8 – GND (black wire)
Additionally there needs to be a 4.7k resistor between the signal and Vdd wires as per the DS18B20 datasheet

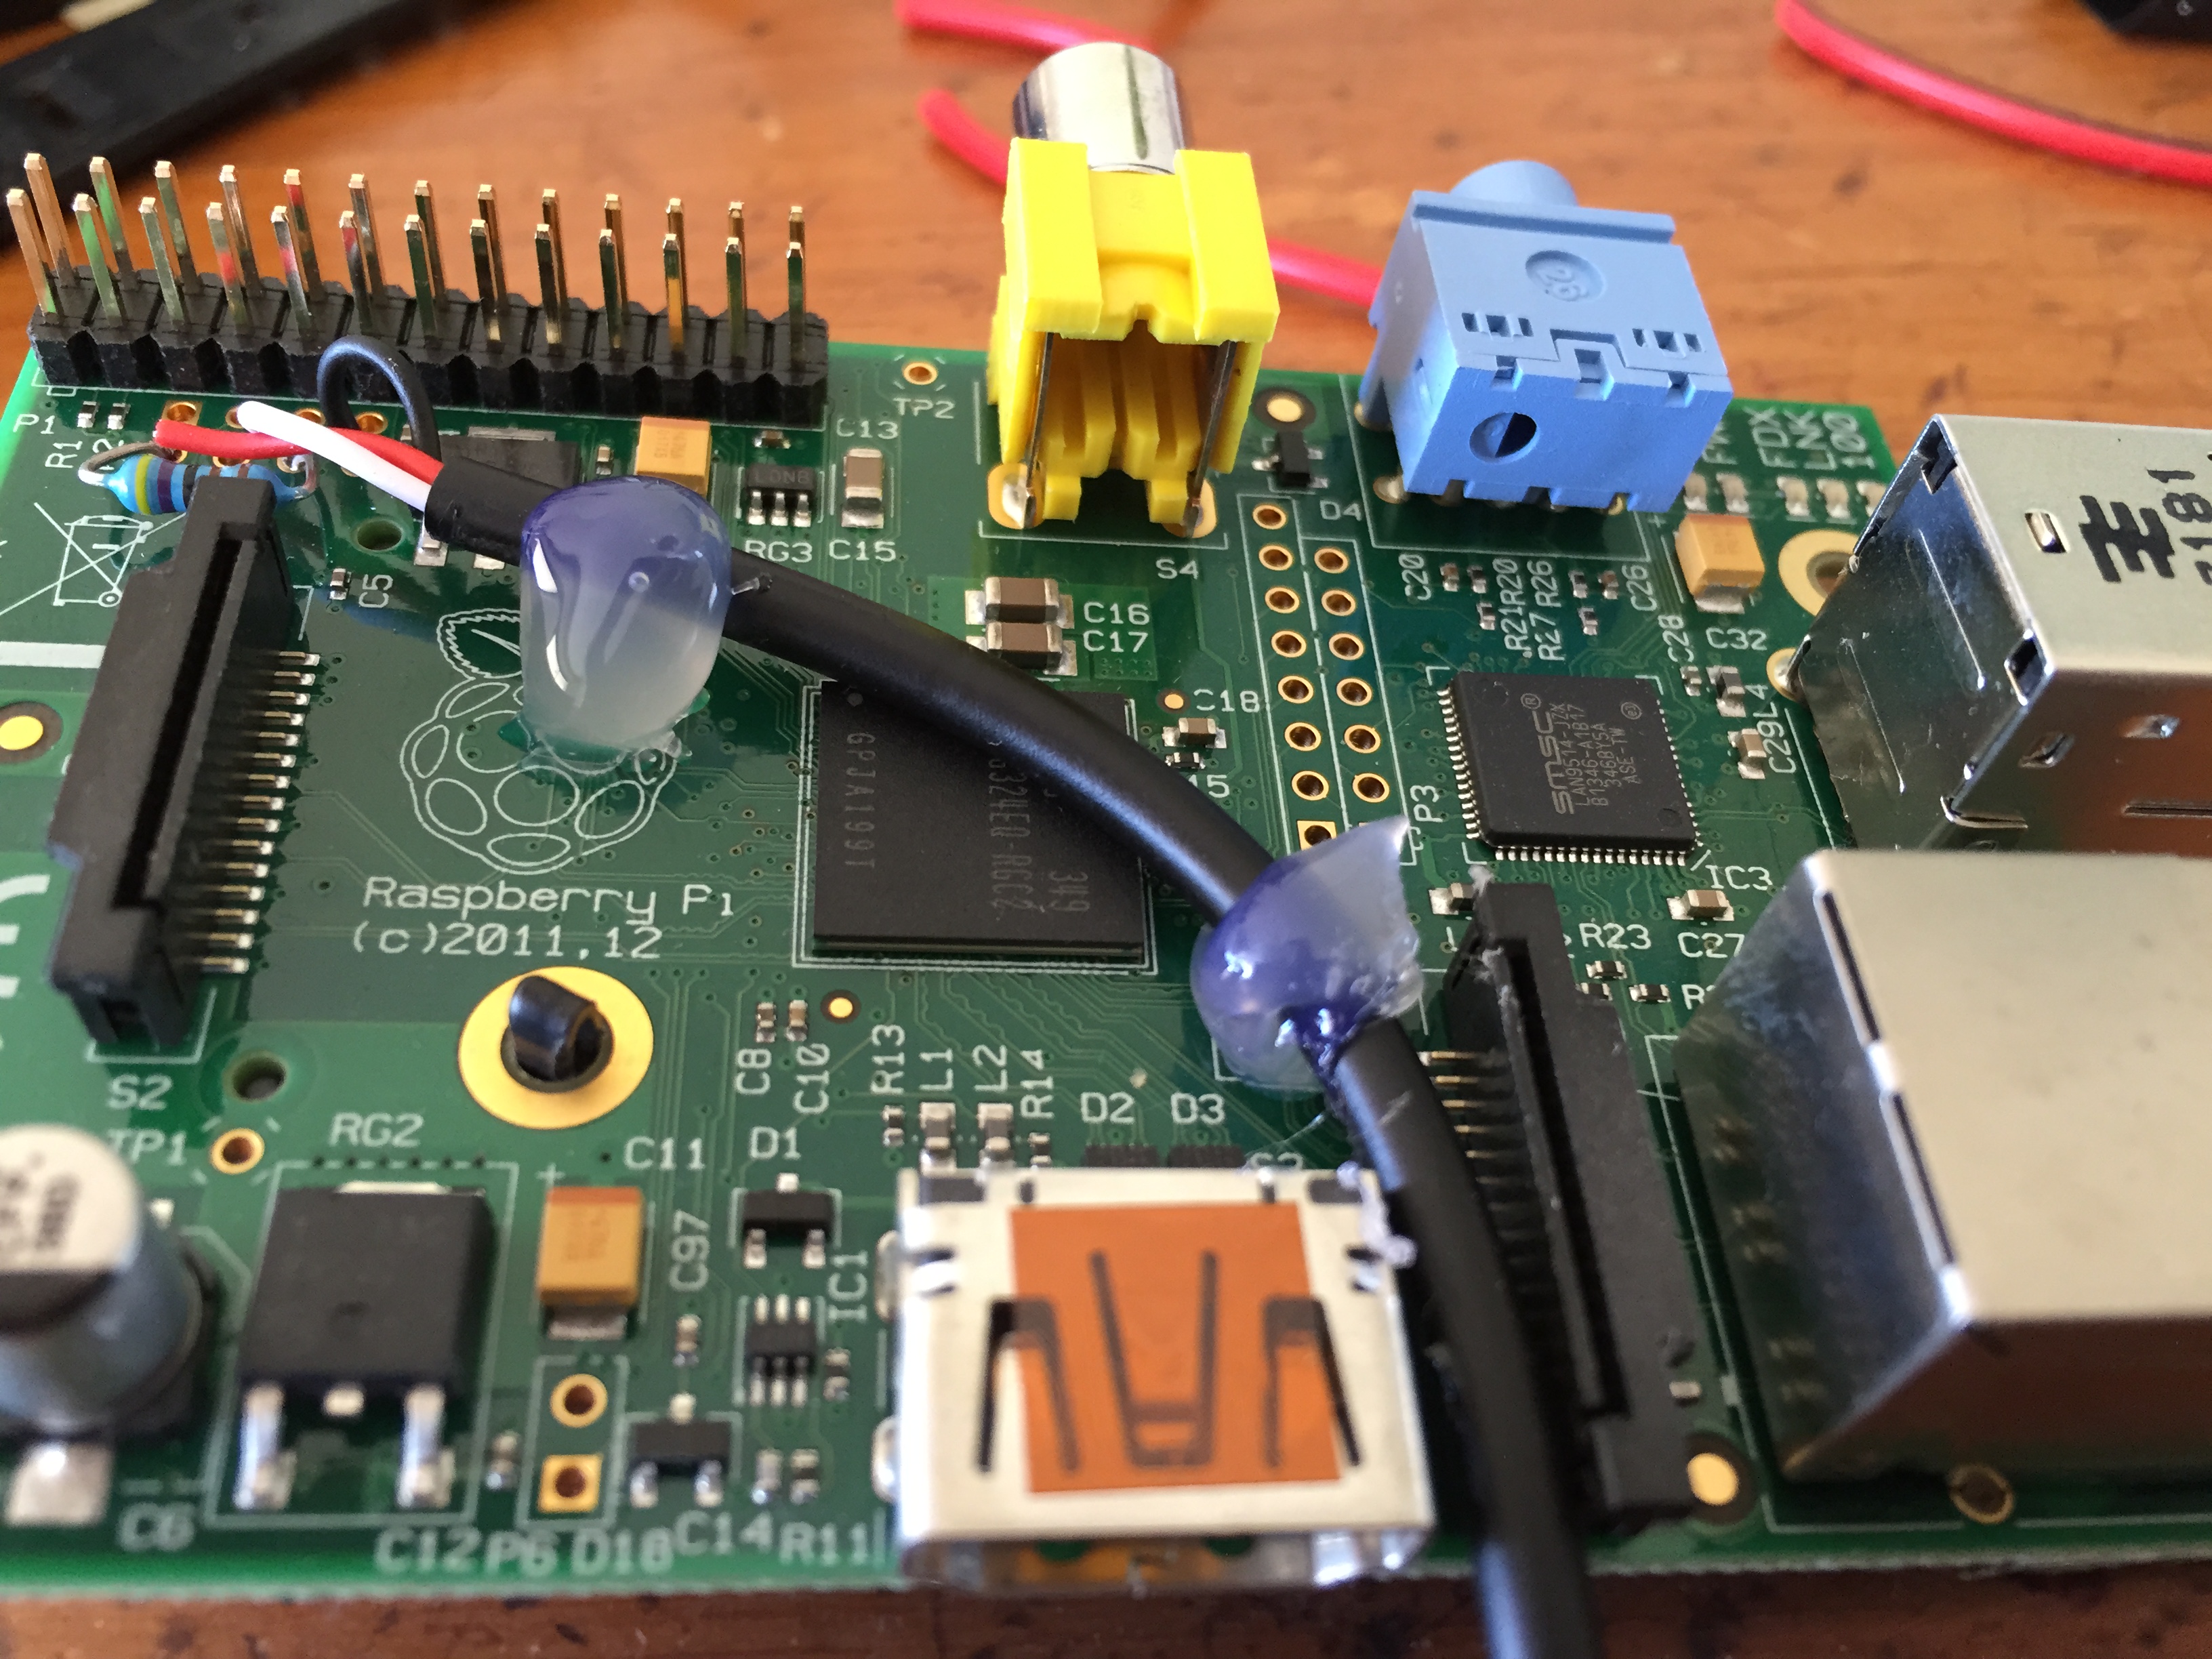
I then hot glued the wire to the PCB in 2 places to provide a measure of strain relief, and re-assembled my Pi. Since I’m not using the HDMI connector, it was a convenient place to route the sensor cable:

Software Configuration
The Pi uses GPIO4 as the default pin for the 1 wire bus, so I needed to change it. I have connected my sensor to GPIO31. We have to tell the Pi’s CPU
I appended the following string to /boot/cmdline.txt
bcm2708.w1_gpio_pin=31
and added the following lines to /etc/modules
w1-gpio
w1-therm
w1-gpio-custom bus0=0,31,0
After a reboot of the Pi I could see the temperature device
# ls /sys/bus/w1/devices/
28-00043b739cff w1_bus_master1
The first device (starting “28-“) is my temperature sensor’s unique address.
# cat /sys/bus/w1/devices/28-00043b739cff/w1_slave
 81 01 55 00 7f ff 0c 10 19 : crc=19 YES
 81 01 55 00 7f ff 0c 10 19 t=24062
Temperature is 24.062 degrees!
I used Timo Furrer’s W1ThermSensor python library to write a script to display the values on an LCD, since I was already using Adafruit’s Python library for the LCD.
git clone https://github.com/timofurrer/w1thermsensor.git && cd w1thermsensor
python setup.py install

pip install w1thermsensor
The following python script will show the current temperature and max/min in the last hour. The custom characters (up and down arrows) are defined as bitmaps and referred to using the ‘\x’ escape sequence
#!/usr/bin/python

# Import all the libraries
from Adafruit_CharLCDPlate import Adafruit_CharLCDPlate
from w1thermsensor import W1ThermSensor
import time

# Sample/Refresh time in seconds
refresh = 60

# Temperature history in values (history duration will be samples * refresh)
samples = 60

# Define and initialise the LCD
lcd = Adafruit_CharLCDPlate()

lcd.begin(16,1)
lcd.backlight(lcd.RED)
lcd.message("PiTemp!")

# degree symbol
lcd.createChar(1, [0b01100,
 0b10010,
 0b10010,
 0b01100,
 0b00000,
 0b00000,
 0b00000,
 0b00000])
# Diagonal up arrow
lcd.createChar(2, [0b00000,
 0b01111,
 0b00011,
 0b00101,
 0b01001,
 0b10000,
 0b00000,
 0b00000])
# Diagonal down arrow
lcd.createChar(3, [0b00000,
 0b10000,
 0b01001,
 0b00101,
 0b00011,
 0b01111,
 0b00000,
 0b00000])


# Define the temperature sensor
sensor = W1ThermSensor()

# Set up the history array
temp = sensor.get_temperature()
templist = [temp] * samples

try:
 while True:
 # Shift out the oldest temperature value
 for x in range(len(templist)-1):
 templist[x] = templist[x+1]
 # Set the end item to be our current temperature
 templist[len(templist)-1] = sensor.get_temperature()
 # Uncomment the following line for debugging
 #print "max %.2f min %.2f\n" % (max(templist),min(templist))

 # Display it on the LCD
 lcd.clear()
 lcd.message("""Temp %.2f \x01C\n\x02 %.2f \x03 %.2f""" %
 (templist[len(templist)-1],max(templist),min(templist)))

 # Sleep until we need to sample/refresh
 time.sleep(refresh)

except KeyboardInterrupt:
 print "Interrupted!\n"


lcd.clear()
lcd.message("PiTemp finished")
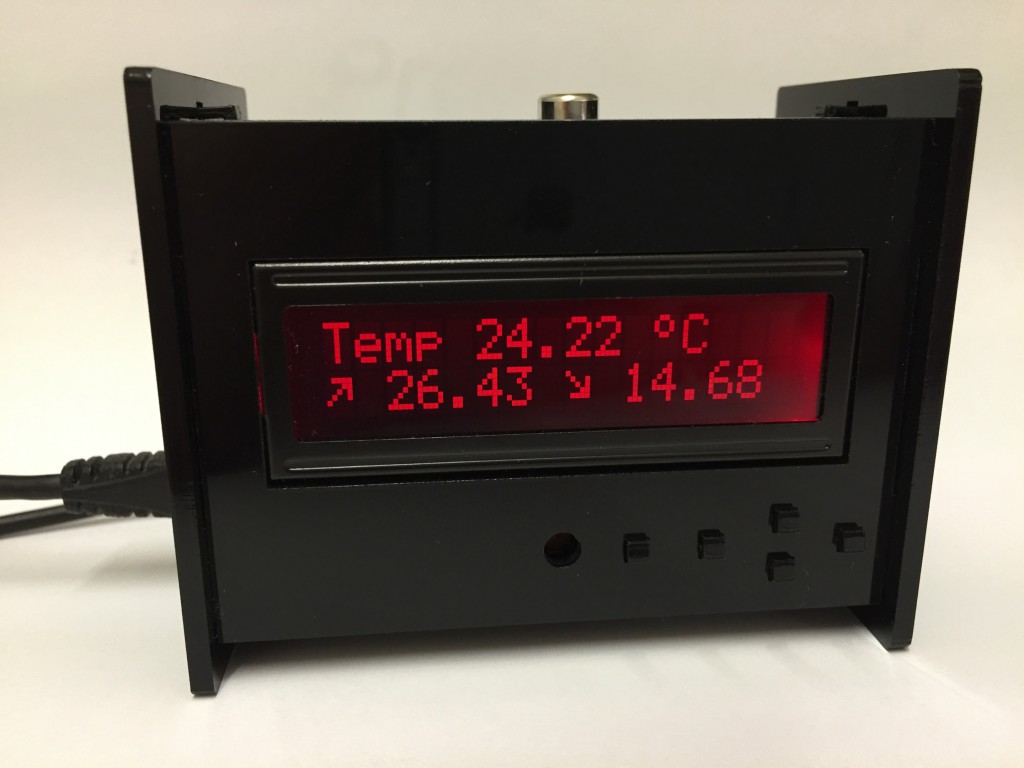
Final result:
![]()
Pingback: Raspberry Pi Webcam (Fishcam) | Scribblings of an Engineer